So, you’ve got your domain registered, and now it’s time to bring your website to life by connecting it to hosting. Connect a Domain to Hosting can sometimes be difficult. but Don’t worry if you’re not sure where to start – we’ve got you covered with this simple step-by-step guide.
So today we will tell you how to connect the Godaddy domain to Hostinger. We are just taking GoDaddy and Hostinger for example, you can take any other domain and hosting, it’s upon you.
Section 1: Understanding the Basics for Connect a Domain to Hosting
Before diving into the process, let’s grasp the basics. Your domain is like your home address on the internet while hosting is the space where your website’s files and data are stored. Connecting them ensures that when someone enters your domain in their browser, they’re directed to your website.
Section 2: Choose Your Hosting Provider
First things first, you need a hosting provider. There are many options out there, but for this guide, we’ll focus on Hostinger. They offer affordable and reliable hosting services perfect for beginners.
Section 3: Find Your Hostinger Default Nameservers
Once you’ve signed up for hosting with Hostinger, you’ll receive an email containing important information, including your default nameservers. Nameservers act as the bridge between your domain and hosting. Make a note of these nameservers as you’ll need them later.
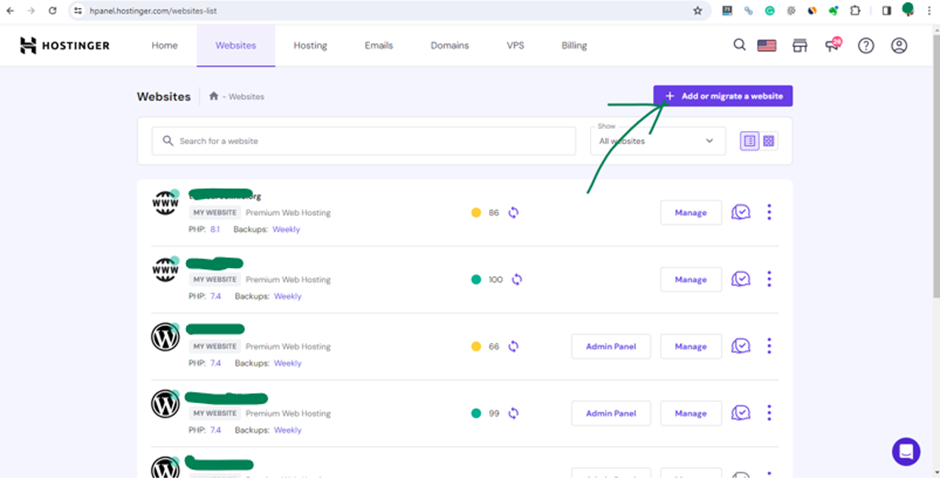
First, we have to go to hostinger.in the website and then go to the website menu.

Then we click on “add or migrate a website” shown in the right corner.
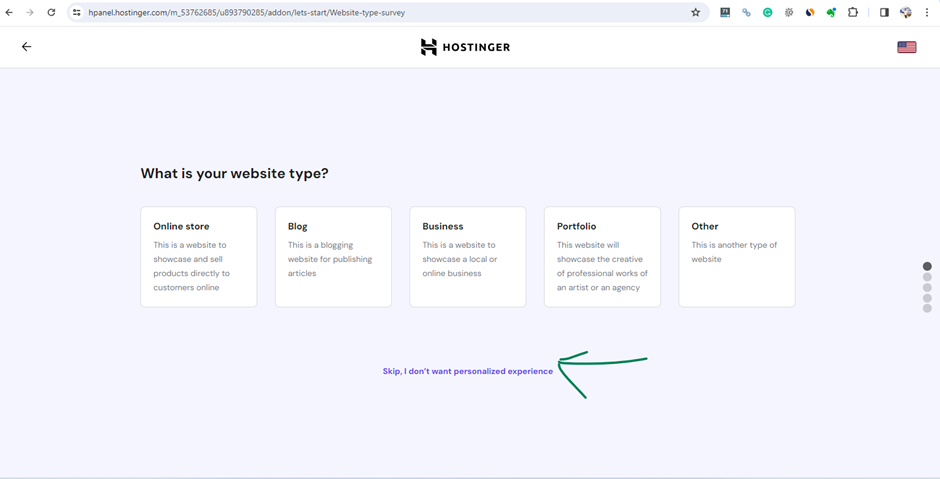
After clicking on “add or migrate a website” a new page is open. Simply we have to click on the skin button which is shown below.
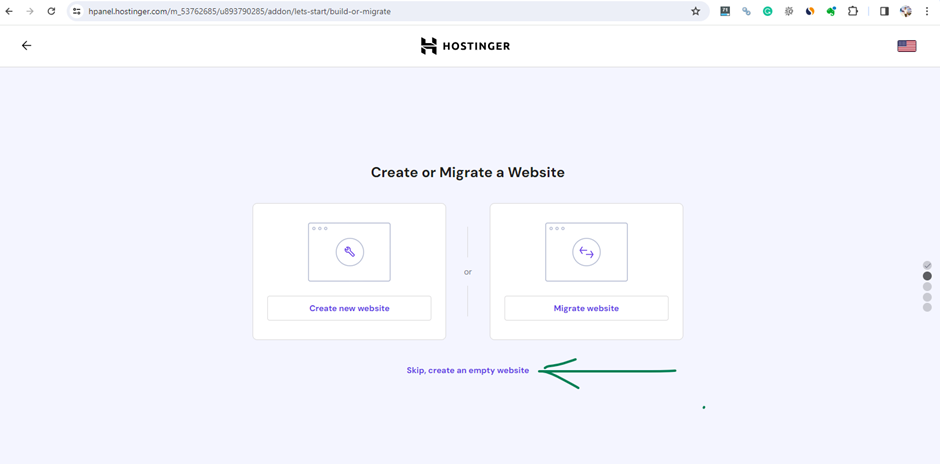
A new page opens once you click the skin button once more. We must click the skip button once again, as indicated below.
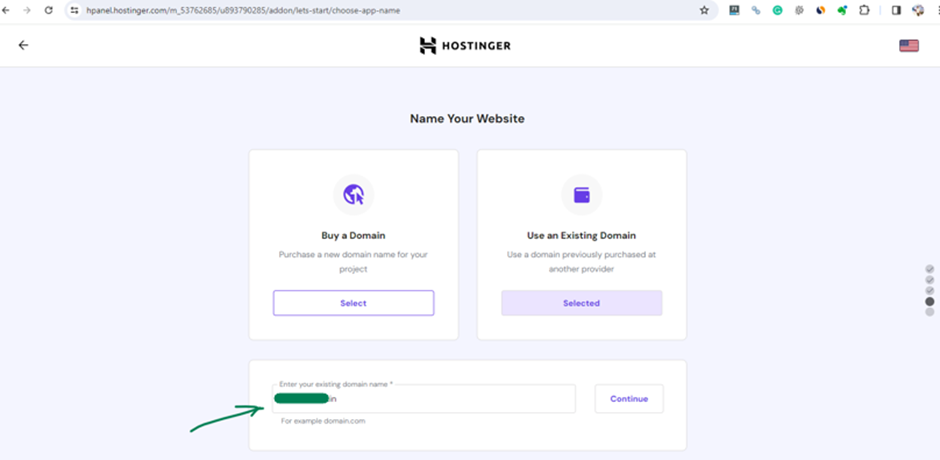
After clicking on the skin button once again a new page opens. We have to click on “use an existing domain” which is shown below.
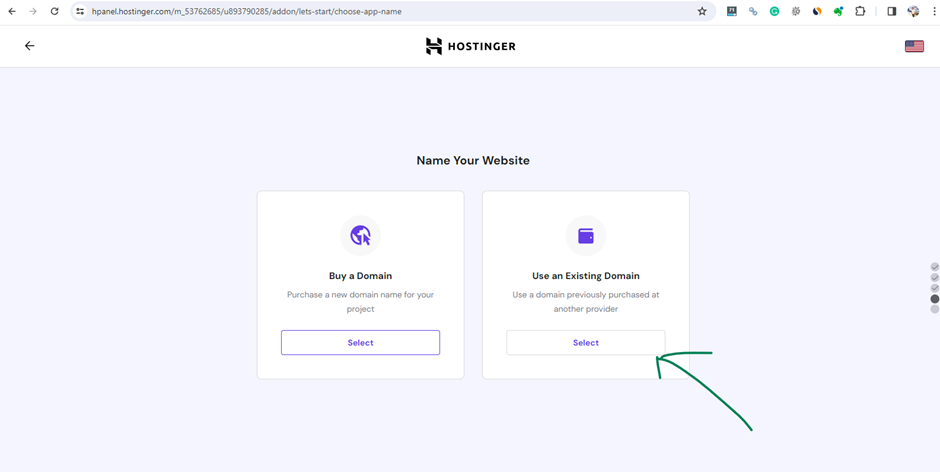
We must enter our domain name in the box below after selecting “use an existing domain,” then click “continue.”
After clicking on the continue button a new page is opened. We have to click on Connect your domain.
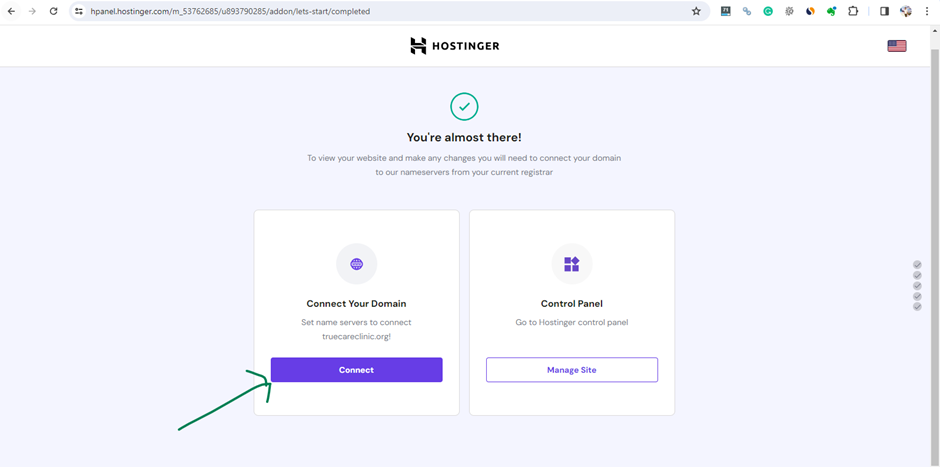
After clicking on connect your domain, a new page is open. We simply click on Let’s start.
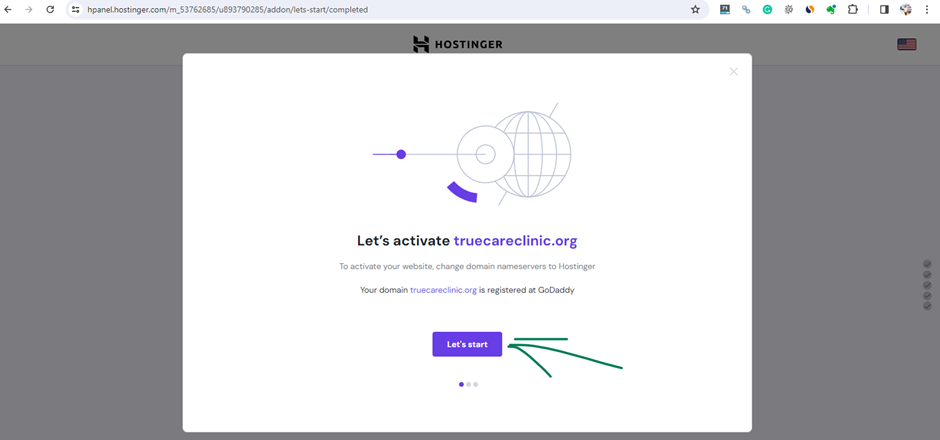
After clicking on “let’s start” again a new page is open. There are two server names 1 and 2. We have to copy server names one by one and paste them into the GoDaddy server names.
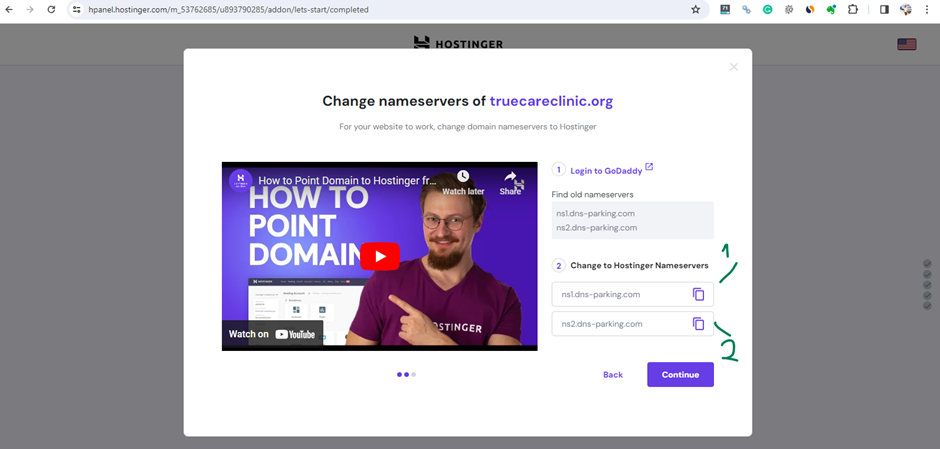
The Hostinger nameservers are:
ns1.dns-parking.com
ns2.dns-parking.com
Section 4: Log in to Your Domain Registrar (e.g., GoDaddy)
If you have already, log in to your domain registrar account. We’ll use GoDaddy as an example here, but the process is similar for other registrars. Locate the domain you want to connect to your hosting account.
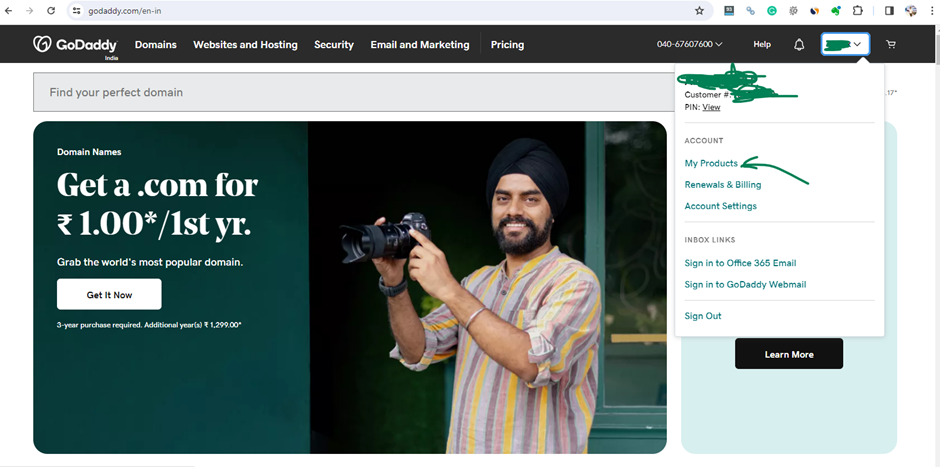
We have to come on the Godaddy website and logging with an ID password. Then we have to click on my products.
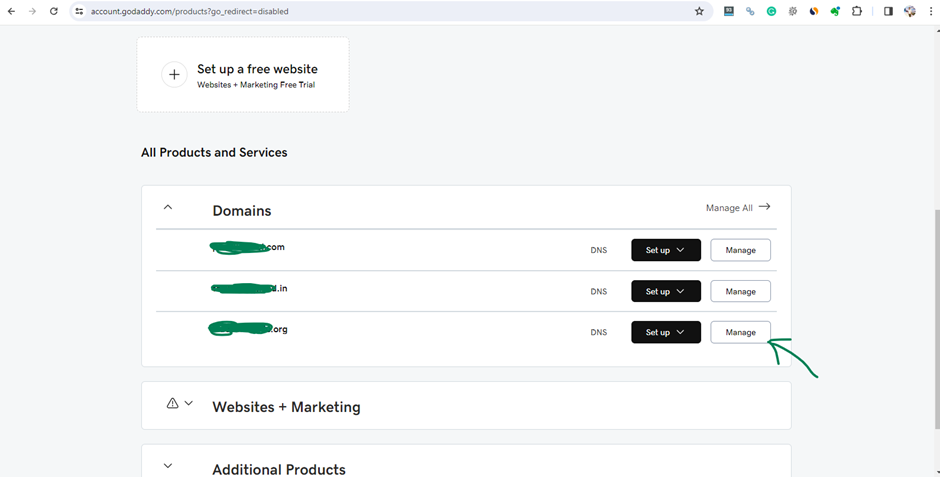
After selecting one of my products. The domain that needs to be connected to the hosting must be selected. Now click on manage.
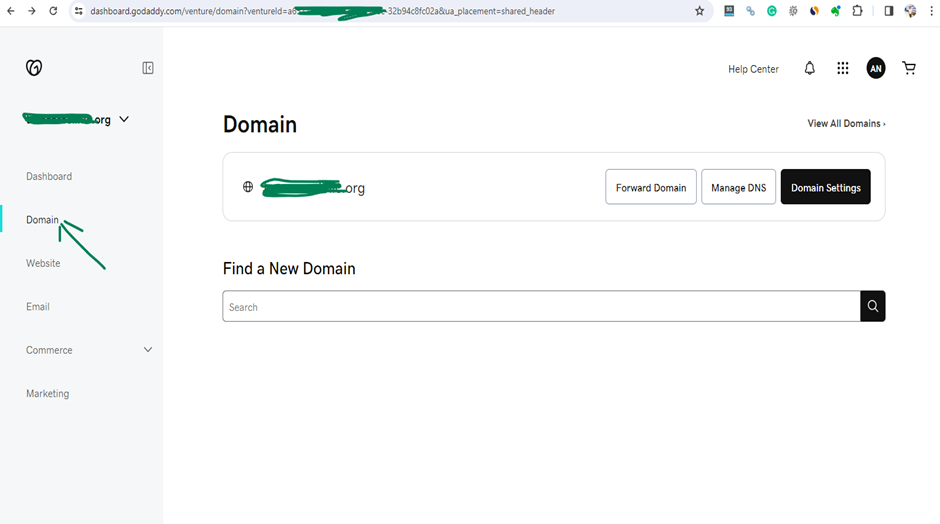
After clicking on manage, we have to click on the domain and then click on manage DNS.

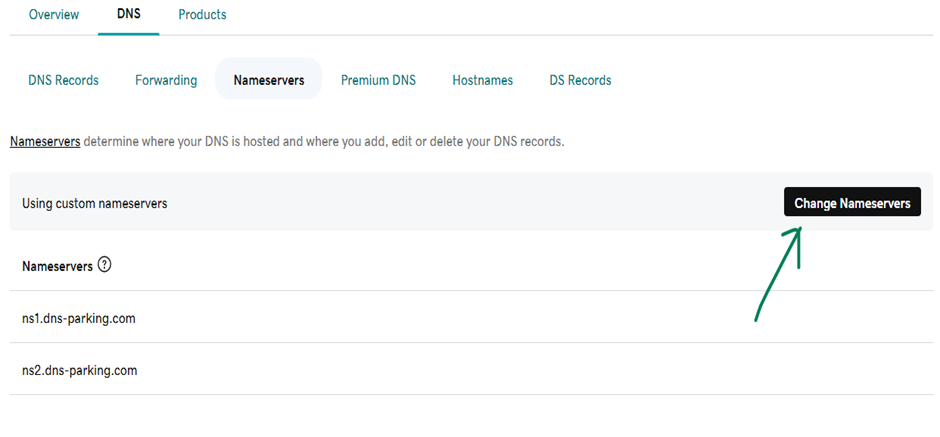
After clicking on manage DNS a new page is open. Simply click on nameservers.
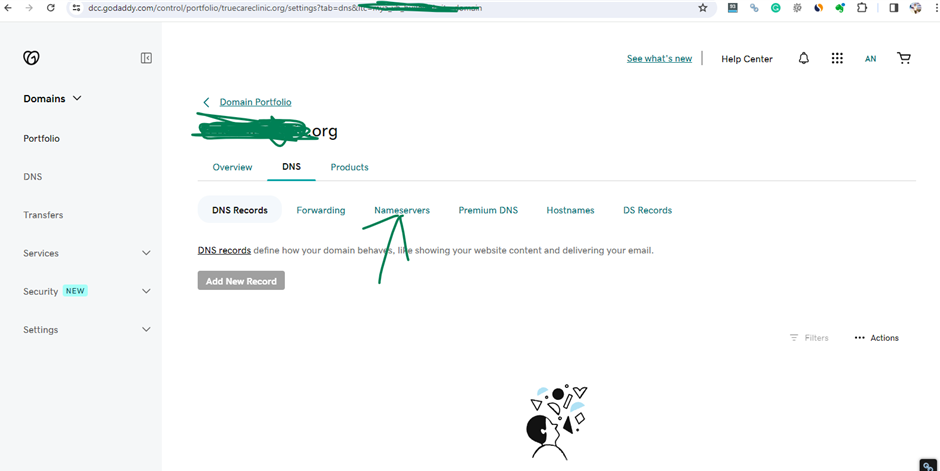
After clicking on the nameservers we have to click on change nameservers.
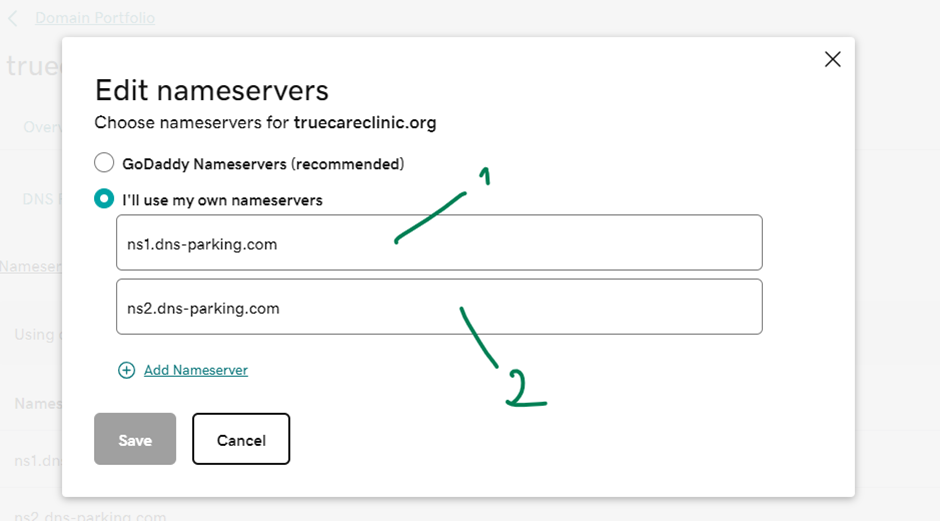
After clicking on change nameservers a new page is open. We have to paste server names which are copied from Hostinger one by one series-wise. Then simply click on save. Sometimes it will take 24 hours to change. But it mostly will change in a few minutes.
Section 5: Change Your Domain’s Nameservers
In your domain registrar account, find the option to manage your domain’s nameservers. Replace the existing nameservers with the ones provided by Hostinger. This step might take a little time to propagate across the internet, so be patient.
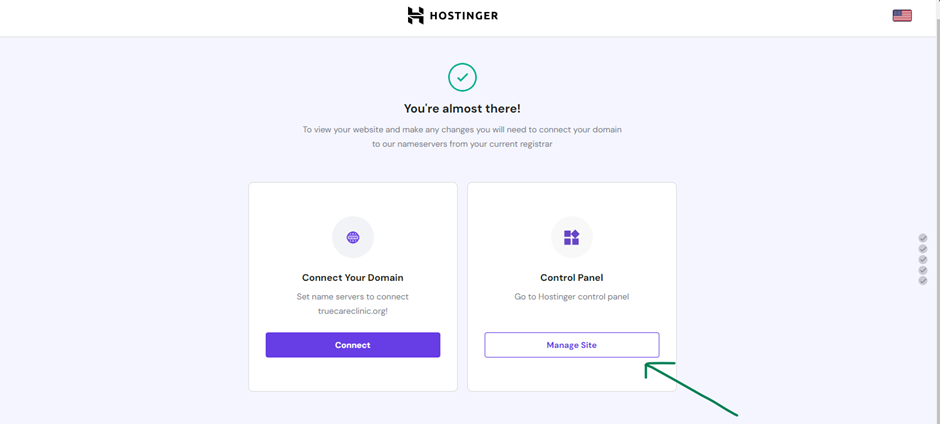
After changing nameservers we had to come on the Hostinger website and now we can manage our site
Section 6: Verify the Connection
Once you’ve updated the nameservers, you’ll need to verify that the connection between your domain and hosting is successful. You can do this by visiting your domain in a web browser. If everything is set up correctly, you should see a page indicating that your website is live!
People also search: How to check the spam score of the website
Conclusion:
Congratulations, you’ve successfully connected your domain to hosting! Now you can start building and customizing your website to your heart’s content. Remember, if you encounter any issues along the way, don’t hesitate to reach out to your hosting provider’s support team for assistance.